Messerschmitt Me 262 (The Black Knight of Berlin)

THE FINISHED MODEL:


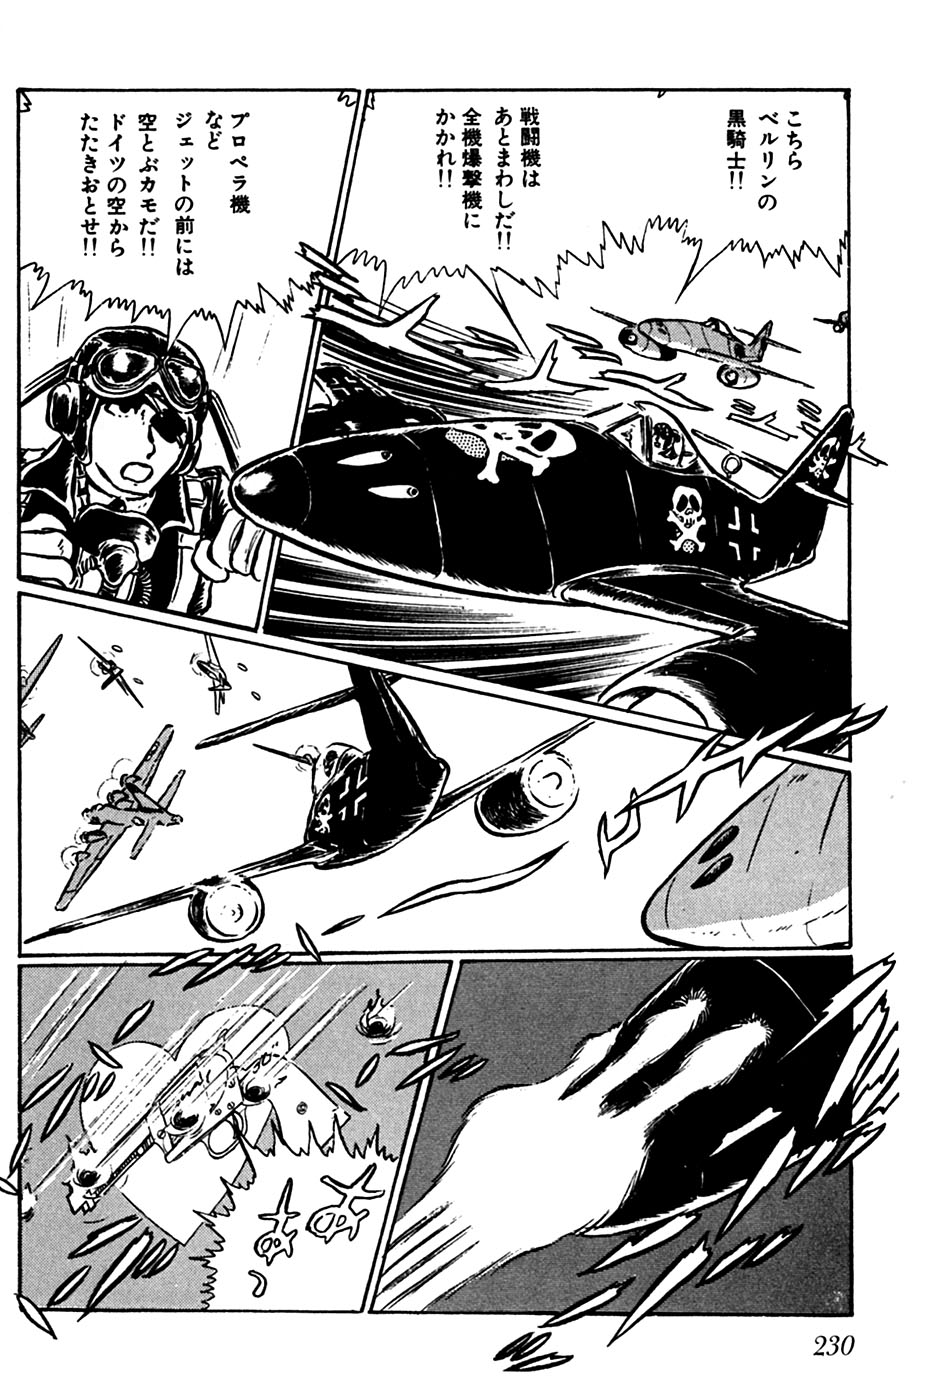
In the Manga:

Known as “The Black Knight of Berlin” for his signature jet black fighter planes, ace German pilot, Lieutenant Herbert von Richter, is known for both his heroism and his skillful efficiency in attack – never damaging a plane any more than strictly necessary to shoot it down. However, this policy backfires on him when he overlooks a P-51 Mustang he thought was disabled and his Focke-Wulf Fw 190D-9 is shot down.
Although he is lucky enough to survive the crash, after he awakens, he is shocked to discover that the young woman named Margaret who rescued him from the burning wreck was caught in a secondary explosion and died as a result of her injuries.
Bitterly, von Richter says “I was shot down because I was sympathetic to the enemy. And to make matters worse, my actions killed this young lady…”
After recovering from his injuries, von Richter takes to the skis in a jet-black Messerschmitt Me 262 and becomes a demon that sheds no tears and attacks his enemies without mercy.
The build:
I’ll confess. This is one of the few builds I’ve done where I wasn’t familiar with the manga/comic story first. Of course I’ve been a fan for Leiji Matsumoto for a long time, but mainly for his sci-fi operatic works, like Galaxy Express 999 and Captain Harlock. None of The Cockpit stories are translated into English (or French), so they’re a lot harder to access.
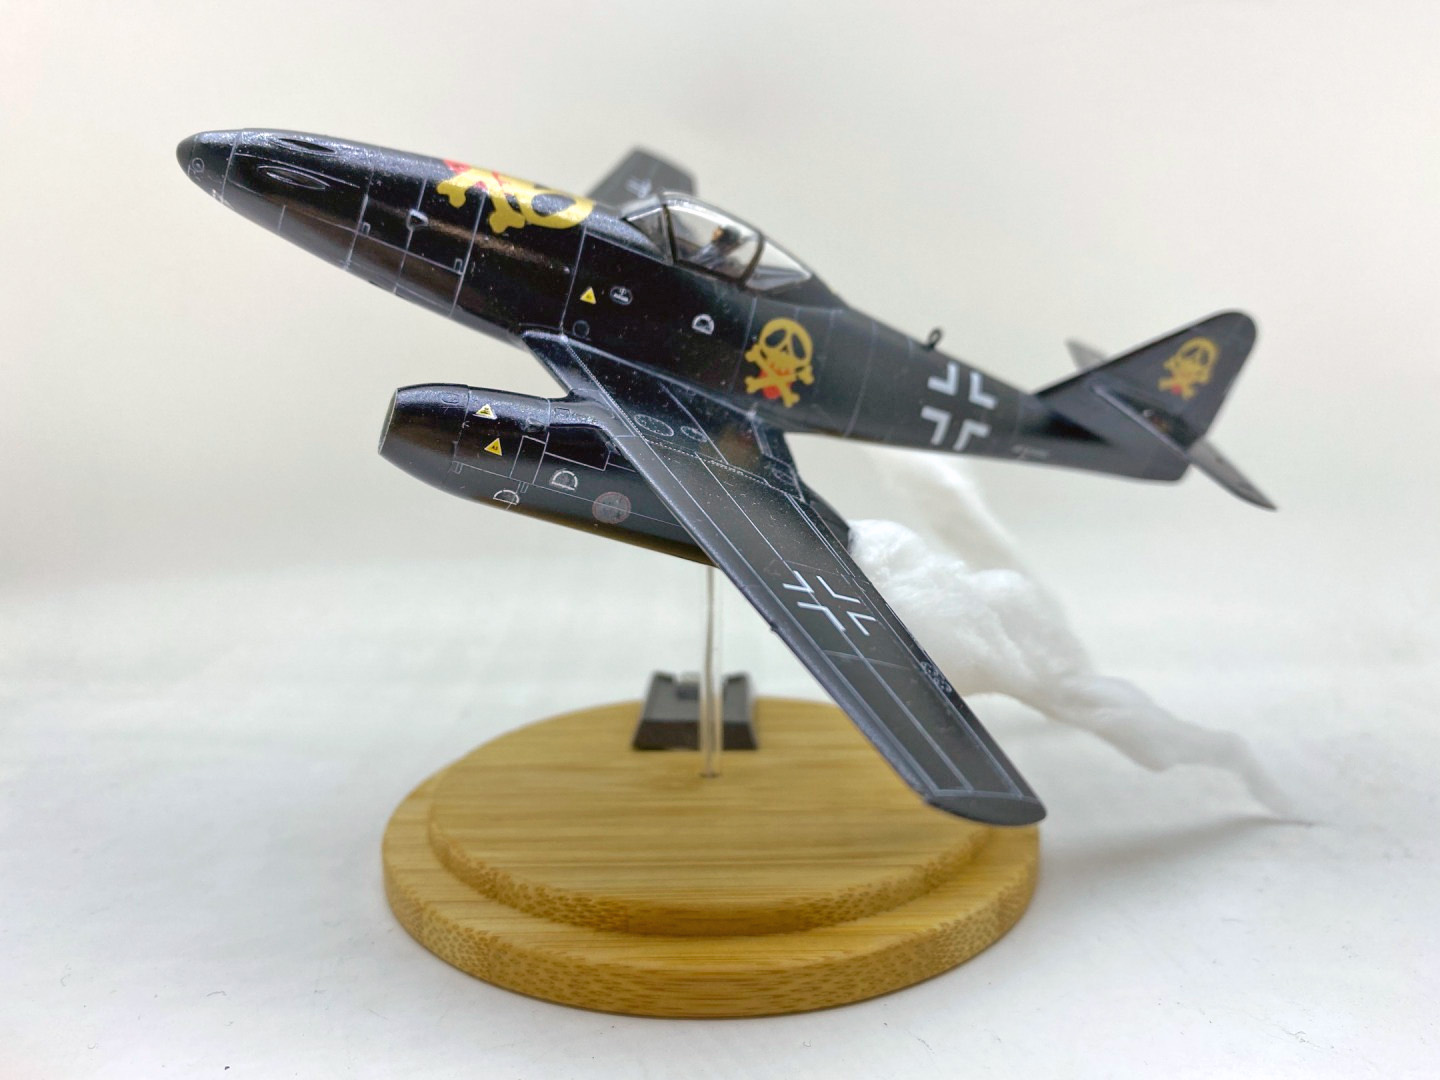
Still, who could resist this box art? A jet-black Me 262 with golden skull/crossbones markings? Not this guy!
The first thing I noticed about the build was how much poorer the Hasegawa Me262 plastic was compared to the Academy offering. It’s actually not bad, per se, but it was hard to avoid comparing given that I’d recently completed my Enemy Ace Schwalbe project build. Still I soldiered on. This was always going to be wheels up, so the details around the wheels weren’t nearly as important. Wiring up a couple of blue LED lights for the engines was easy enough, and the kit came together quickly. I was actually quite please with the result after the whole thing got a coat of Tamiya X-18 Semi-Gloss Black.
The real problem started with trying to apply white panel lines to the black plane. My first instinct was to use thinned Tamiya X-1 White enamel paint – something I was familiar with working with when I lived in Seoul – but for whatever reason I simply couldn’t find any anywhere in Canada. So I tried using Testors as a substitute. That basically met with disaster. The Tamiya thinner didn’t work with the Testors enamel and then the Testors enamel thinner ended up leaving a thin haze over the semi-gloss Tamiya black coat. I ended up scrubbing it a bit too hard, and it was back to the drawing board and another coat of paint.
Then I had an airbrush malfunction while applying a top coat of Future (basically made the surface covered with little blobs) and cleaning that up also meant stripping the black and reapplying it. I tried using a white “weathering” crayon that I picked up at a local hobby shop. It worked, but was much too faint to make much of an impact. Then I tried using the chalk technique and was pleasantly surprised by the results. By basically crushing some white chalk into fine dust and applying it with water, it sits in the panel lines and works well. The main problem was that, after all that handling and repainting, the crispness of the panel lines had lost a lot. All in all, it was pretty frustrating.
Then, by some miracle, Tamiya enamel paints showed up out of the blue at my local hobby shop. I immediately snatched up a few bottles and was set to try what I’d wanted to do from the beginning. However, I’d lost faith in the plastic and the only way to regain it was to start over – this time with the much better (in my opinion) Academy kit.
Not much to say about the rebuild. I was able to re-use the pilot figure and the LED lights and being familiar with the kit already, the build came together relatively easily. The only real challenge was closing up the wheel wells. Finally the panel line wash worked exactly as I’d hoped. It was thin and I was careful to applying it sparingly, so the clean up was minimal.
The decals are really what make this build though – which was why I was so hesitant to proceed with a project I felt was sub-standard. They went on easily enough once I remembered to be patient and not force the film off the backing before it was ready. I did have a spot of trouble getting the main nose skull/crossbones one to sit flat. Something about the bend in the fuselage didn’t quite agree with it. I ended up with a tiny bump, but not so bad that I was willing to risk “fixing” it.
All in all, this was a build that was a long time coming, but in the end lived up to the vision I had. But check it out and leave me a comment to tell me what you think:


THE TAMIYA PAINT :
- XF-1 (Black) – Main Fuselage
- XF-16 (Flat Aluminum ) – Engine Interior
- XF-56 (Metallic Grey) – Engine Interior
- XF-63 (German Grey) – Control Panel
- XF-22 (RLM Grey) – Cockpit Interior
Discover more from strobez
Subscribe to get the latest posts sent to your email.