F11F Tiger “Blue Angels” (Gary MacBurn)
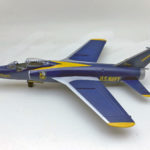
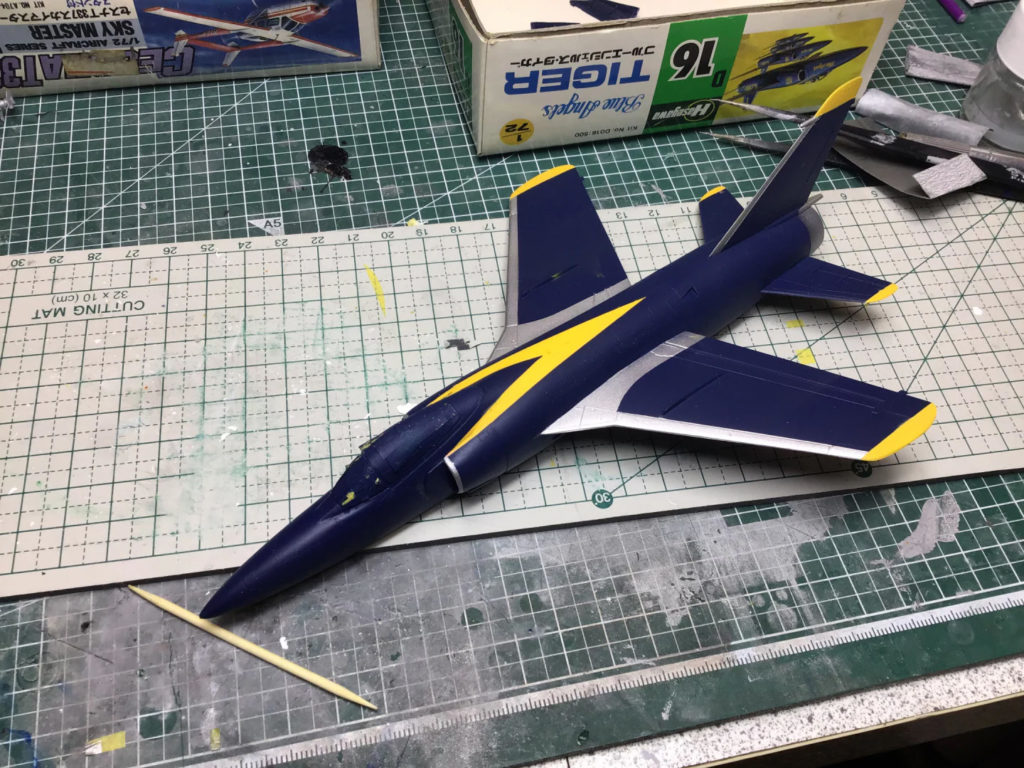
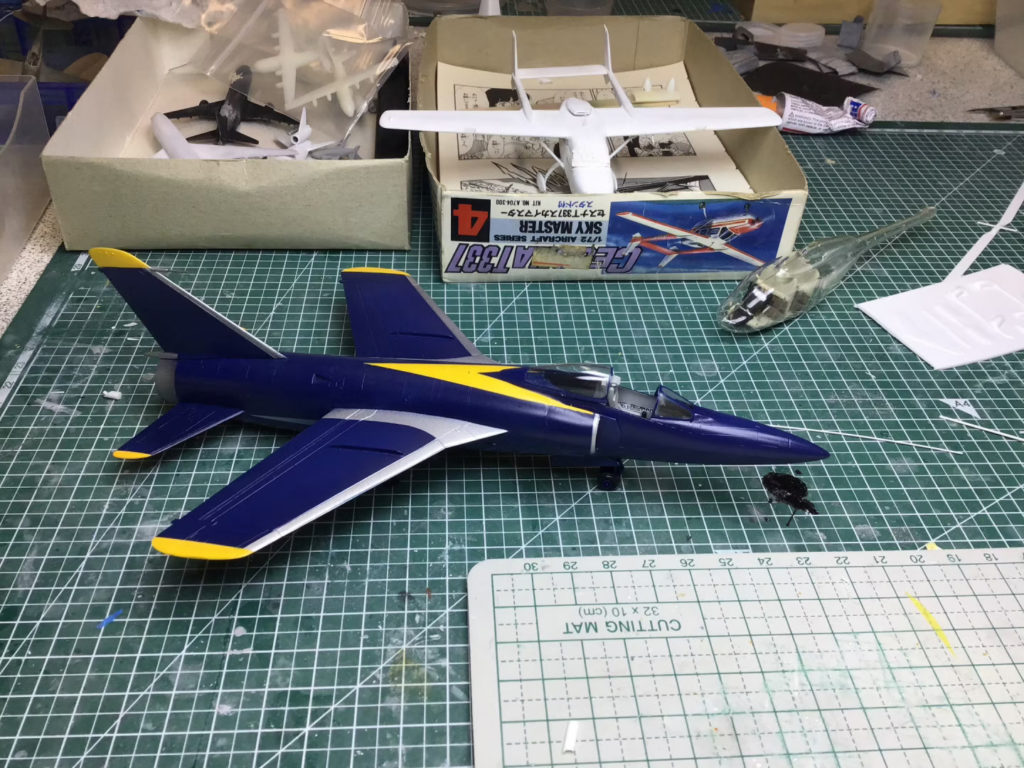
The finished model:


In the manga:
In the skies over Asran, Mickey encounters a MiG-21 flown by none other than his old friend and rival, Gary MacBurn. The two land and Gary recounts the story of his life – how he grew up in poverty, joined the U.S. Navy and eventually studied his way into becoming an officer candidate and then a pilot. After Vietnam, Gary became the soloist in the U.S. Navy’s aerobatics team, The Blue Angels. But that life – always on the move from one show to the next, took it’s toll on his wife, his marriage and his daughter.
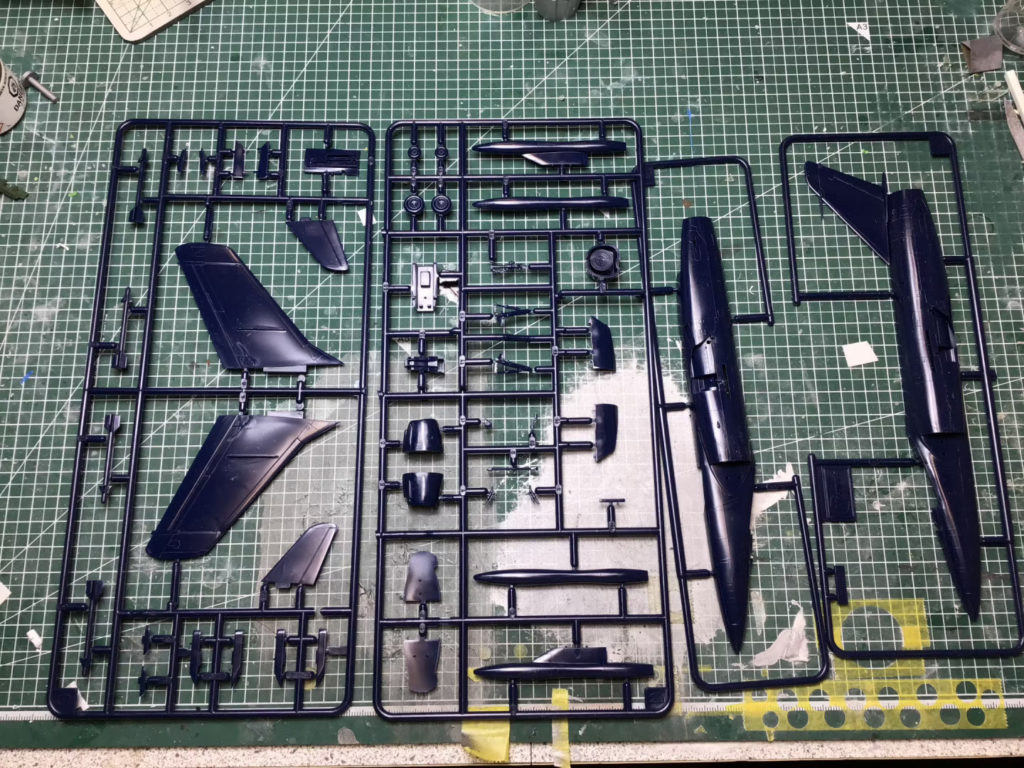
The kit(s):
- F11F Tiger “Blue Angels” by Hasegawa
The build:
Despite not actually being on the battlefield in Asran, the F11F Tiger is another one of the jet planes that is referenced in a flashback episode. As part of the Blue Angels, it’s also one of 3 “Aerobatic” team planes mentioned in the Area 88 manga. The other two being the (mentioned but never shown) Fiat G.91 flown by Mario Baldini as part of the Italian team, the Frecce Tricolori, and the Patrouille de France SEPECAT Jaguar that Shin flies while in Paris.
Luckily Hasegawa has seen fit to provide a boxed version that perfectly fits the bill! Despite being a bit old (and with the obligatory raised panel lines) it’s a good kit and easy enough to build right out of the box.
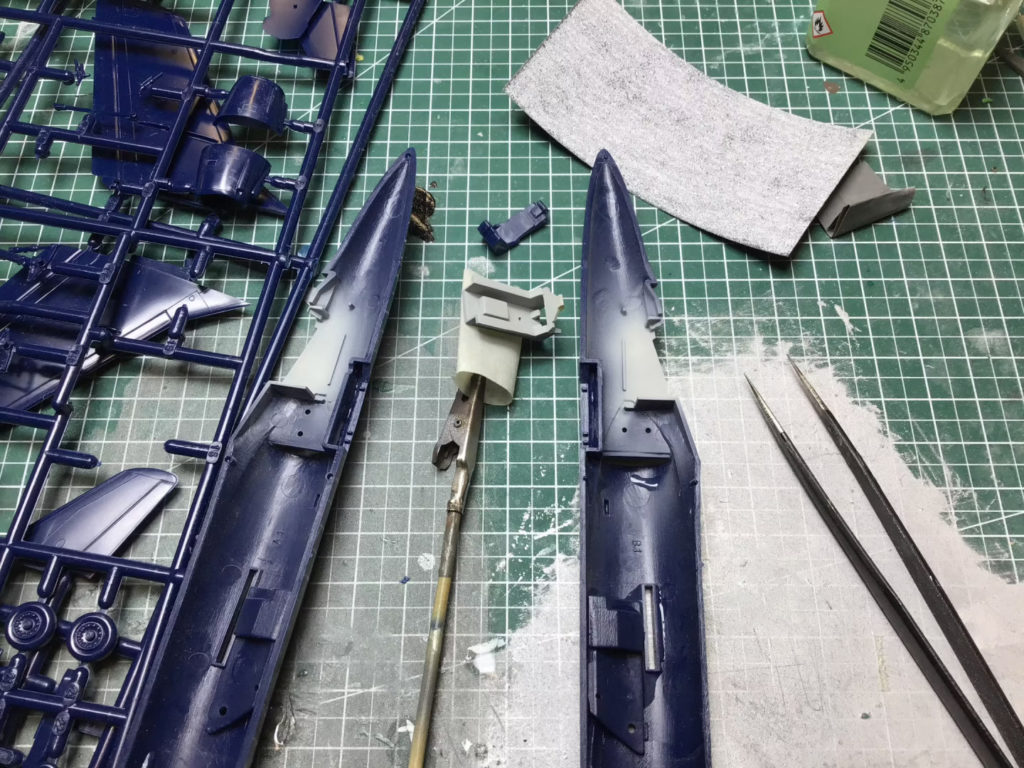
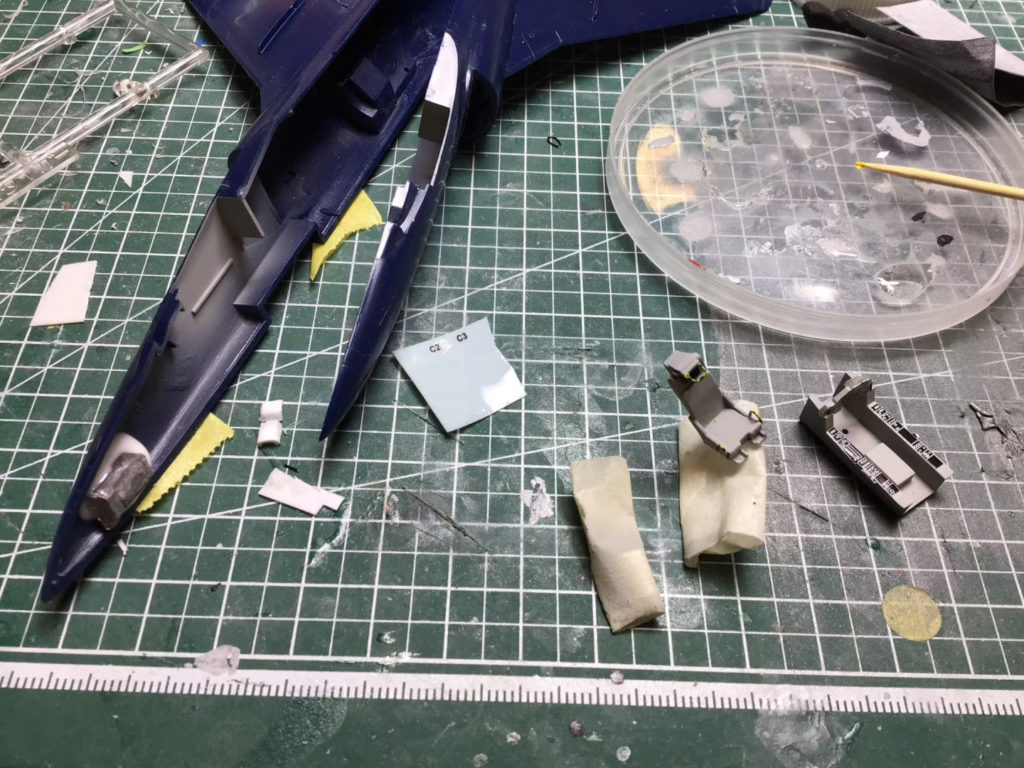
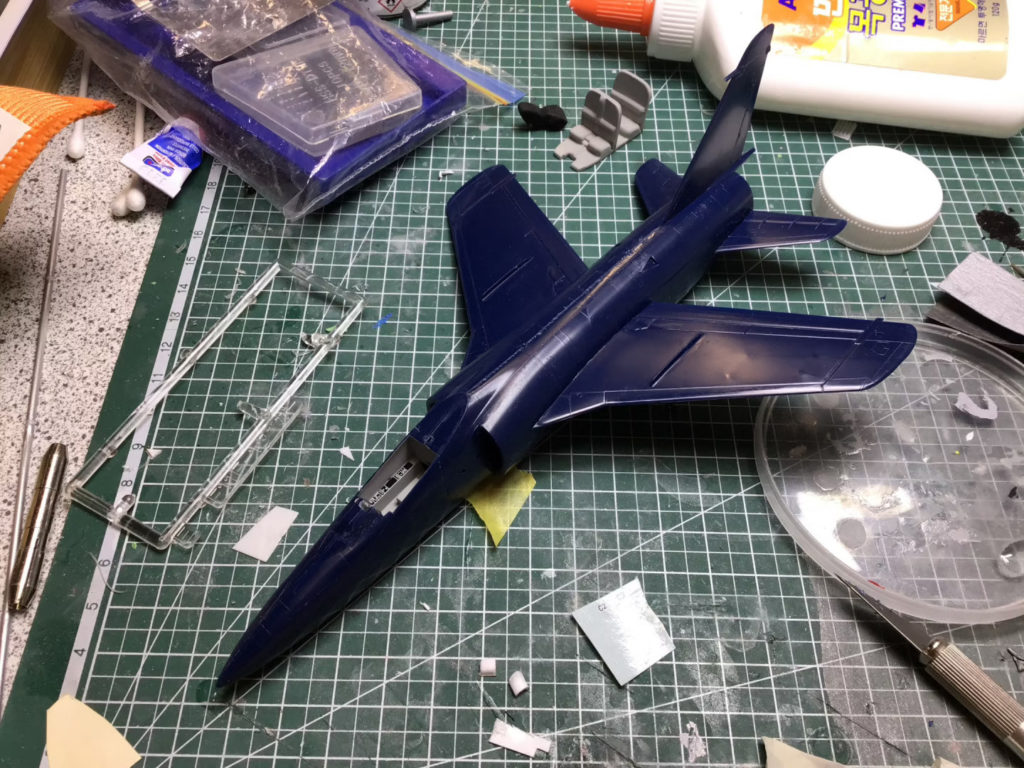
Not a lot of drama in this one, to be honest. The cockpit came together nicely, and I used the supplied decals for the control panels. I supposed I couldn’t done a bit more detailing, considering I left the canopy open… but this isn’t really a major part of my 1/72 scale Area 88 project, so it is what it is. I did have a bit of trouble with the seams – mainly because I find it difficult to sand around raised panel lines. I know there’s a technique to re-raise panel lines that get sanded away – by using a blade to push up the plastic – but I’ve never tried it and don’t have a lot of faith in my ability to pull it off.
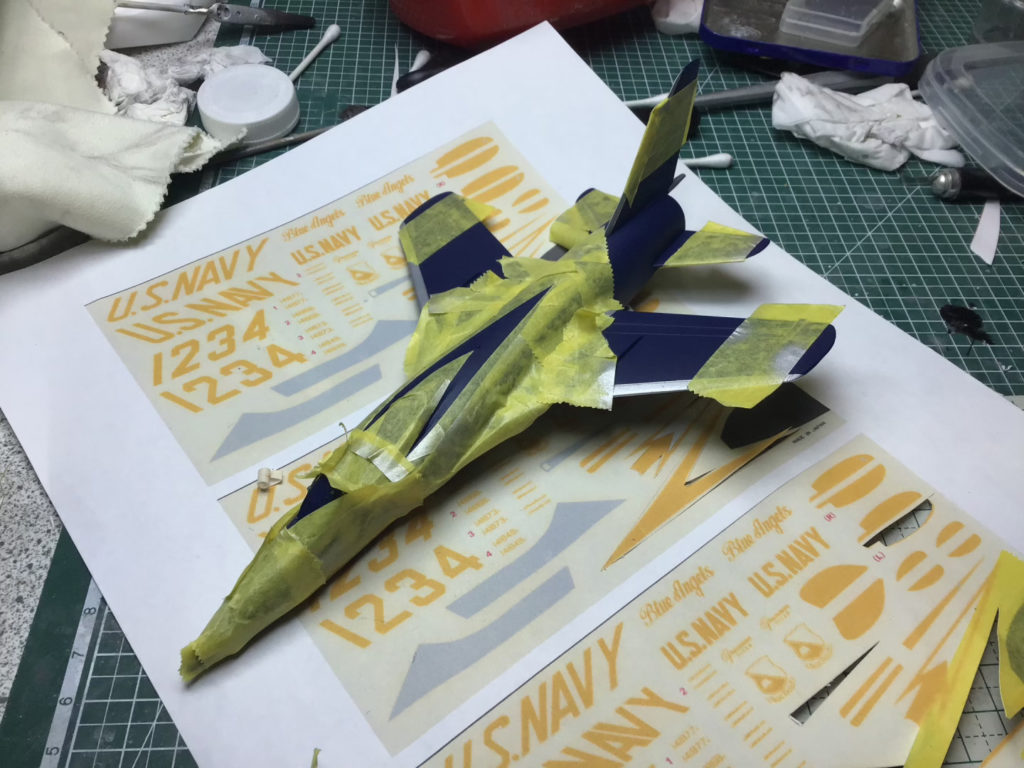
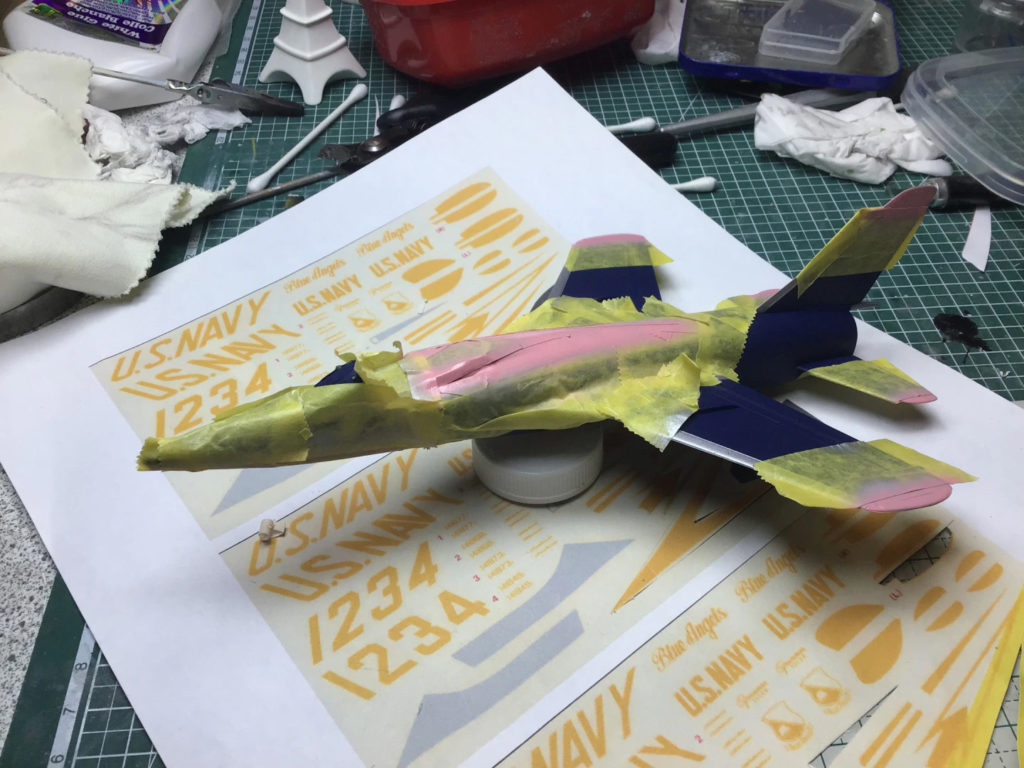
The trickiest part was the masking and painting. I was a bit worried about the age of the decals in the box, so i decided to try my luck at masking. I did scan in the decals and then use them as a template to cut some tape to fit, and surprisingly that worked well. I was a bit worried about some of the thin/intricate lines, but a bit of patience went a long way.
As far as the paint itself goes, it was easy to just paint the whole fuselage Tamiya XF-8 Flat Blue – I did get a bit confused and did a touch up using X-4 Blue, but I noticed something was off and quickly changed course to correct the mistake. The XF-16 Aluminum worked well – since I always seem to miss spot of tape and get some shiny specks where I don’t want them. This time that oversprya happened with the XF-3 Yellow. Not a major problem to fix though. As always, I used Tamiya X-15 Pink as an undercoat and it makes the yellow really pop.
As it turned out, I was wise not to trust the decals. The smaller ones were fine, but the larger “US NAVY” ones on the underside of the wings were a bit tricky and started falling apart on me. I didn’t take any pictures of that though, so it never happened, right?
All in all I’m happy with how it turned out, but feel free to lend me your comments below:


THE TAMIYA PAINT :
- XF-3 (Yellow) – striping
- XF-8 (Blue) – main fuselage
- XF-16 (Aluminum) – wings
- XF-19 (Sky Grey) – cockpit
- XF-85 (Dark Iron) – inside engine
- X-15 (Pink) – undercoat for yellow
Discover more from strobez
Subscribe to get the latest posts sent to your email.